用于Windows开始菜单的动态磁贴开发保姆级教程
读前须知⚠️若要在Windows11上使用磁贴开始菜单,需要使用第三方工具 Github@valinet/ExplorerPatcher↗ (也可先参考我的介绍文章↗)
从WinUI3项目中开发开始菜单个性化磁贴显示软件,可以用于个性化美化Windows开始菜单
教程适用于新手,在 #磁贴开发 前的内容可实现简单磁贴展示,不需要会任何编程
项目使用WinUI3,所以相当于也是一个WinUI3软件的入门开发教程了
开发环境
需要Windows10或11系统,.NET环境,主要会用C#(C++也可以)
如果你是Windows开发新手或为了省事,那直接下载Microsoft Visual Studio吧,VS集成了所有东西且给予了UI操作,非常方便,本文也会使用VS2022以及最“轮椅”的方式来讲解
在安装VS时需要选择
WinUI应用程序开发
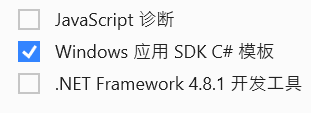
.NET桌面开发 (含Windows应用SDK C#模板)
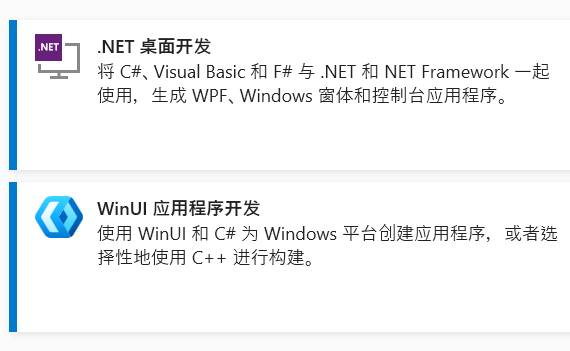
若使用C++,则需要C++桌面开发 + Windows应用SDK C++模板
若原来就安装了VS,那就在任务栏搜索Visual Studio Installer,然后点击修改
WindowsApp项目
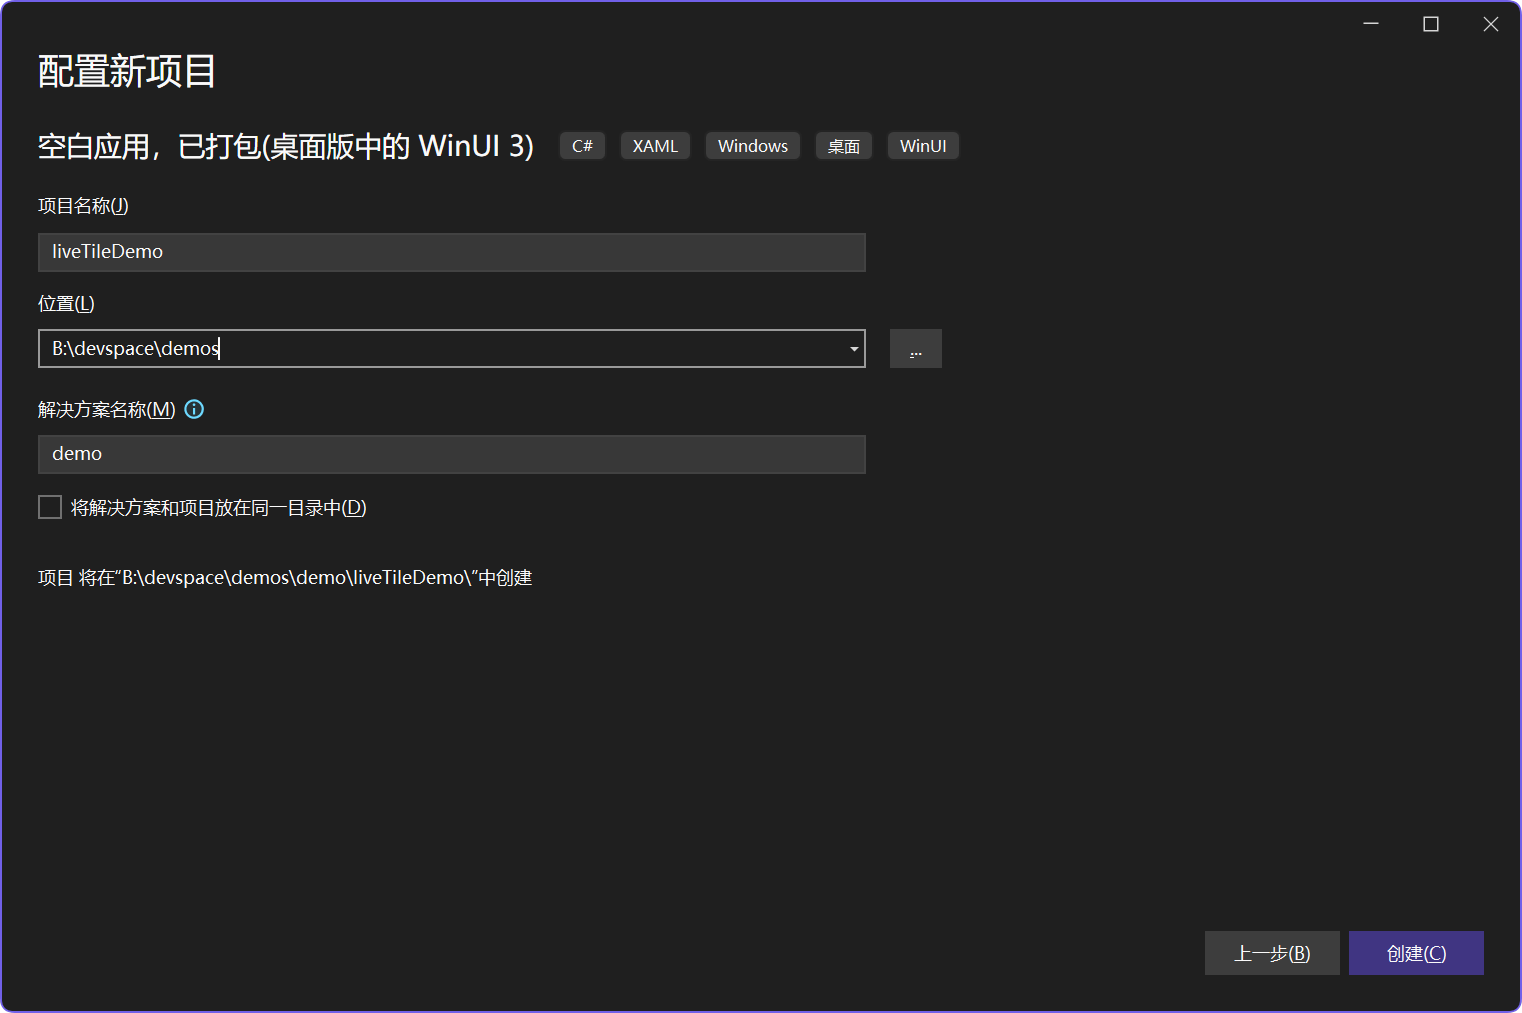
创建项目
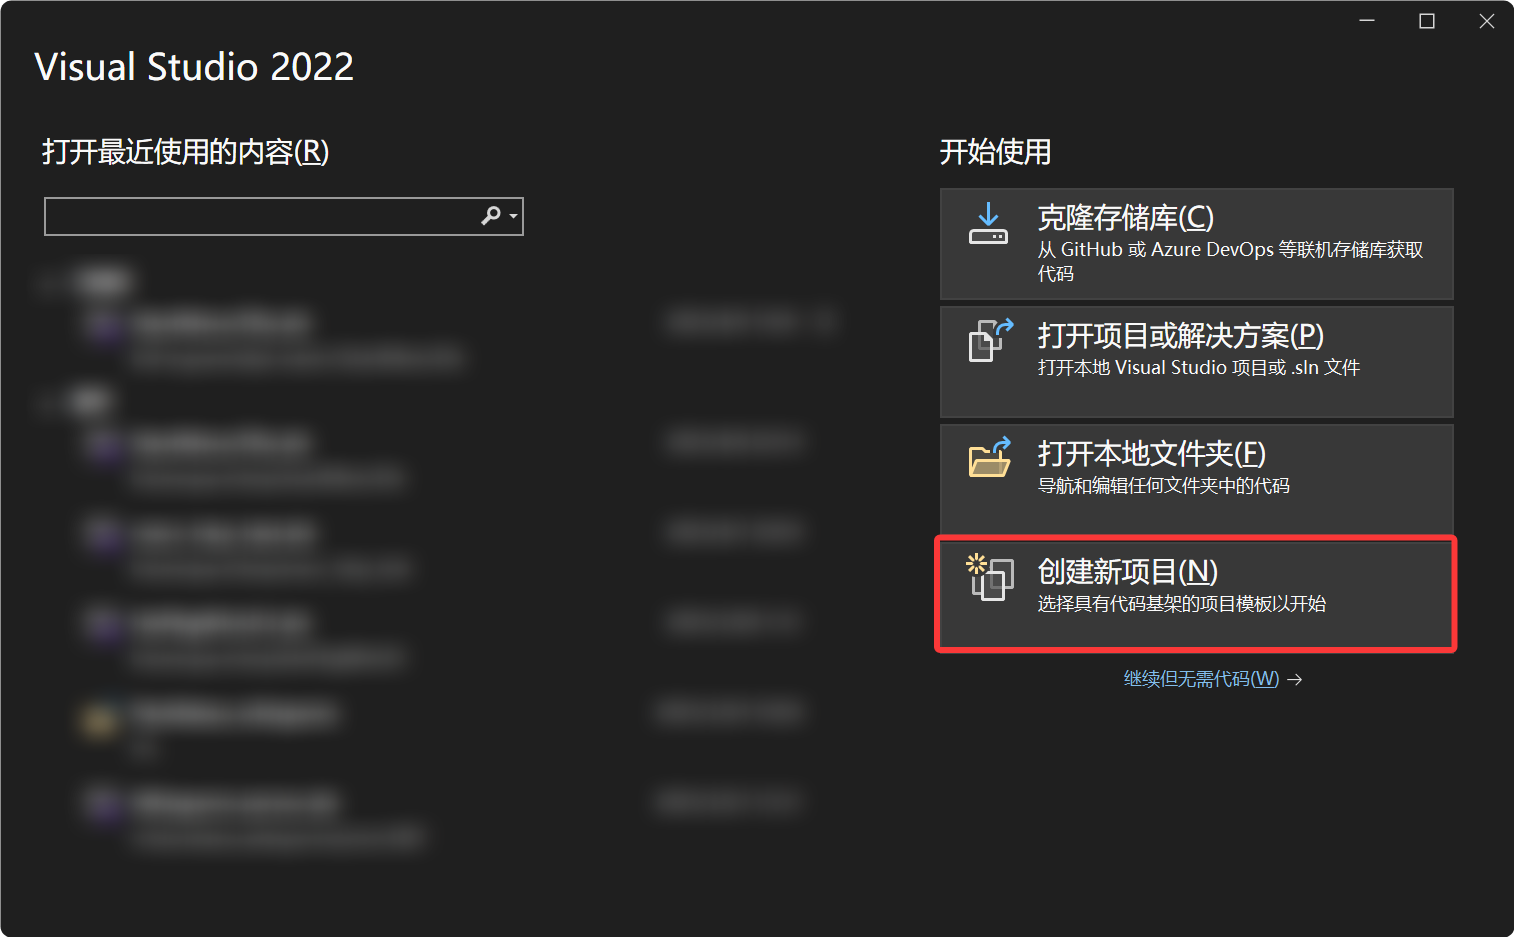
打开VS2022
选择 创建新项目
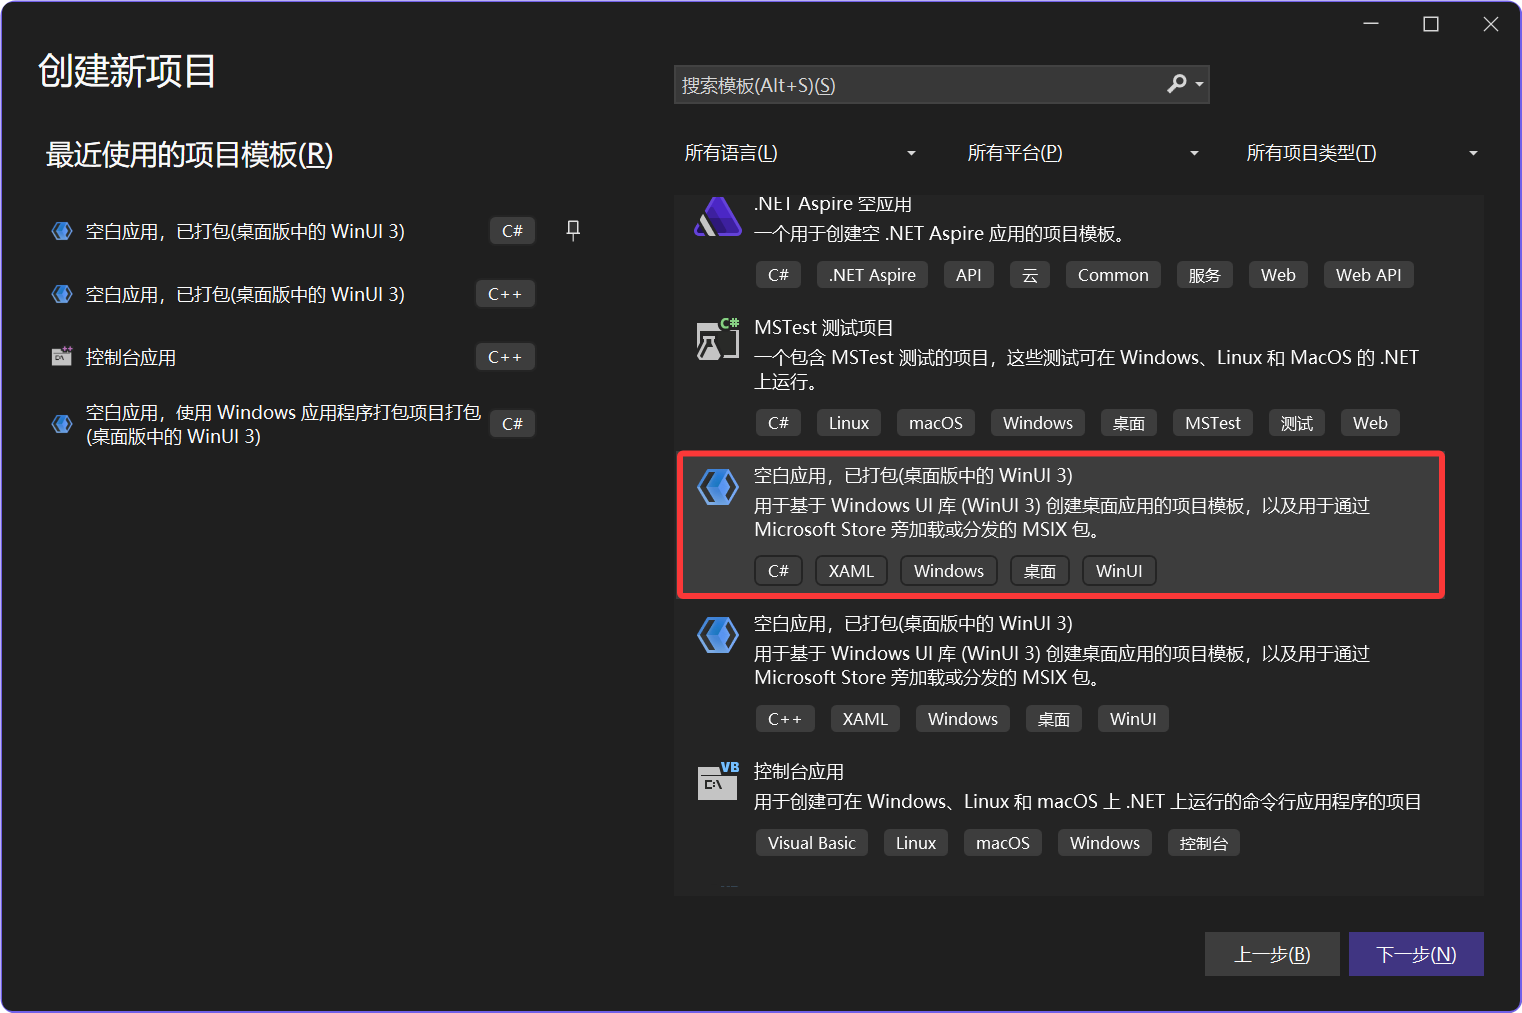
选择 空白应用,已打包(桌面版中的 WinUI 3)
根据自己的需求配置名字、路径等等 并点击创建
磁贴功能
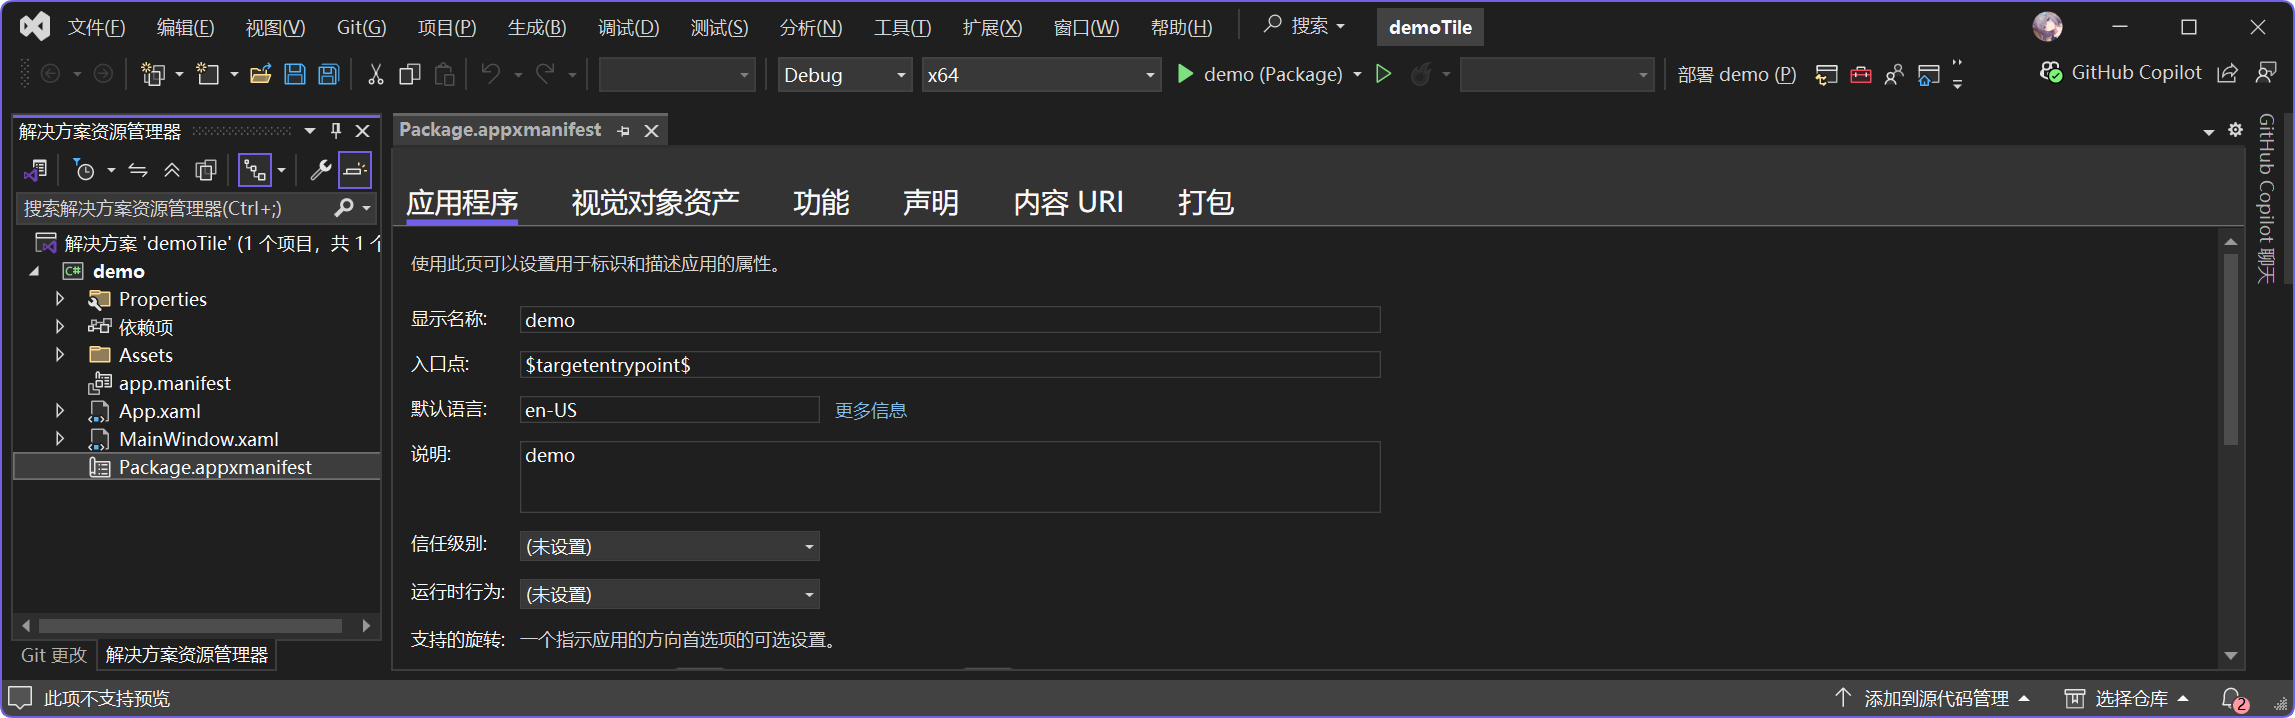
现在进入VS2022
首先看到左侧或右侧 解决方案资源管理器
双击其中的Package.appxmanifest
| 如果没有解决方案资源管理器
| 在VS2022窗口最上方点击【视图(V)】
| 解决方案资源管理器即可打开
因为这是一个模板,所以理论上,这个已经是一个软件了,可以直接编译、部署、运行
点击上方的 ▷ demo (Package) 即可立即开始构建调试
在2025年的默认版本,直接运行起来应该是这样的,如果运行成功,说明项目基本没有任何问题

(补充)部分版本VS组件未下载完整可能会缺少库,需要手动在NuGet下载库
(补充)NuGet: .NET的包管理工具,为了让WinUI3项目通过编译构建,需要下载对应的库
此时Windows开始菜单应该就已经有对应的App了(左上角最近添加,则是你刚刚的App)
点击固定到开始屏幕(如果无效则鼠标按住拖动过去)
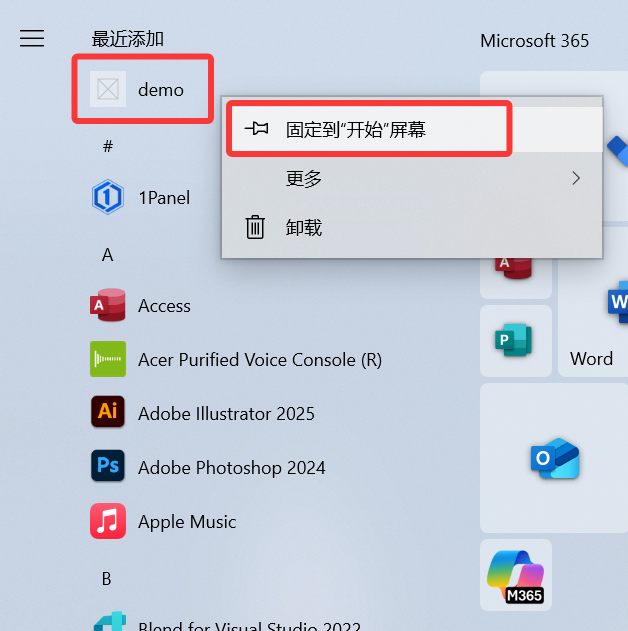
他出现在了磁贴菜单中,但还是空白
要更换磁贴图片,请提前准备好图片
小尺寸 1:1(推荐71⨉71像素)
中尺寸 1:1(推荐300⨉300像素)
宽尺寸 31:15(推荐620⨉300像素)
大尺寸 1:1(推荐620⨉620像素)
(以上尺寸仅作推荐,通常比例正确就行 <这也是为什么用WinUI3项目模板的原因>)

回到VS2022中,点击 视觉对象资产,在其中即可通过UI的方式编辑磁贴图
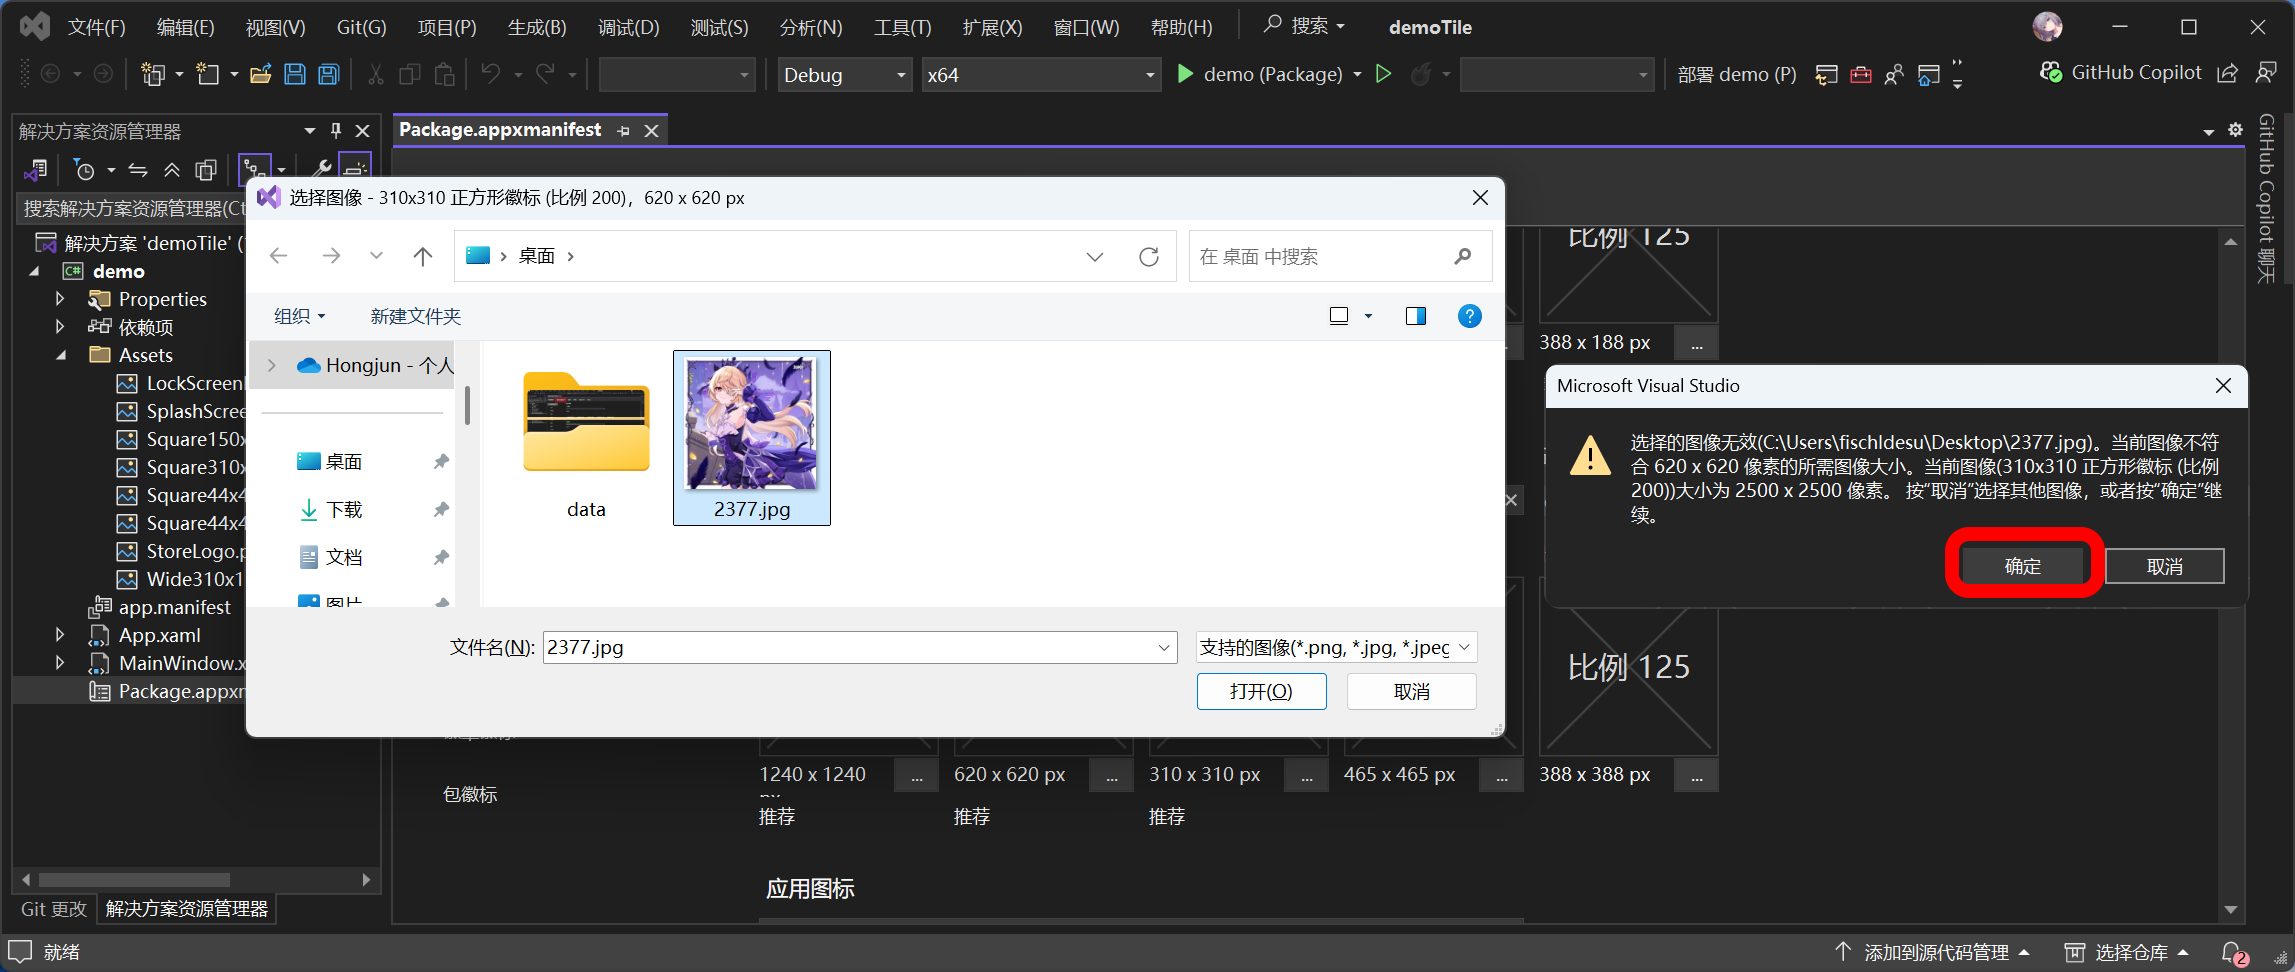
滑动到下方 预览图像 内,点击对应尺寸下的【...】即可选择图片
⚠️考虑到大部分人需求都是大此贴,因为小、中磁贴都是不需要专门创建项目的,本文后续都将以大磁贴做演示
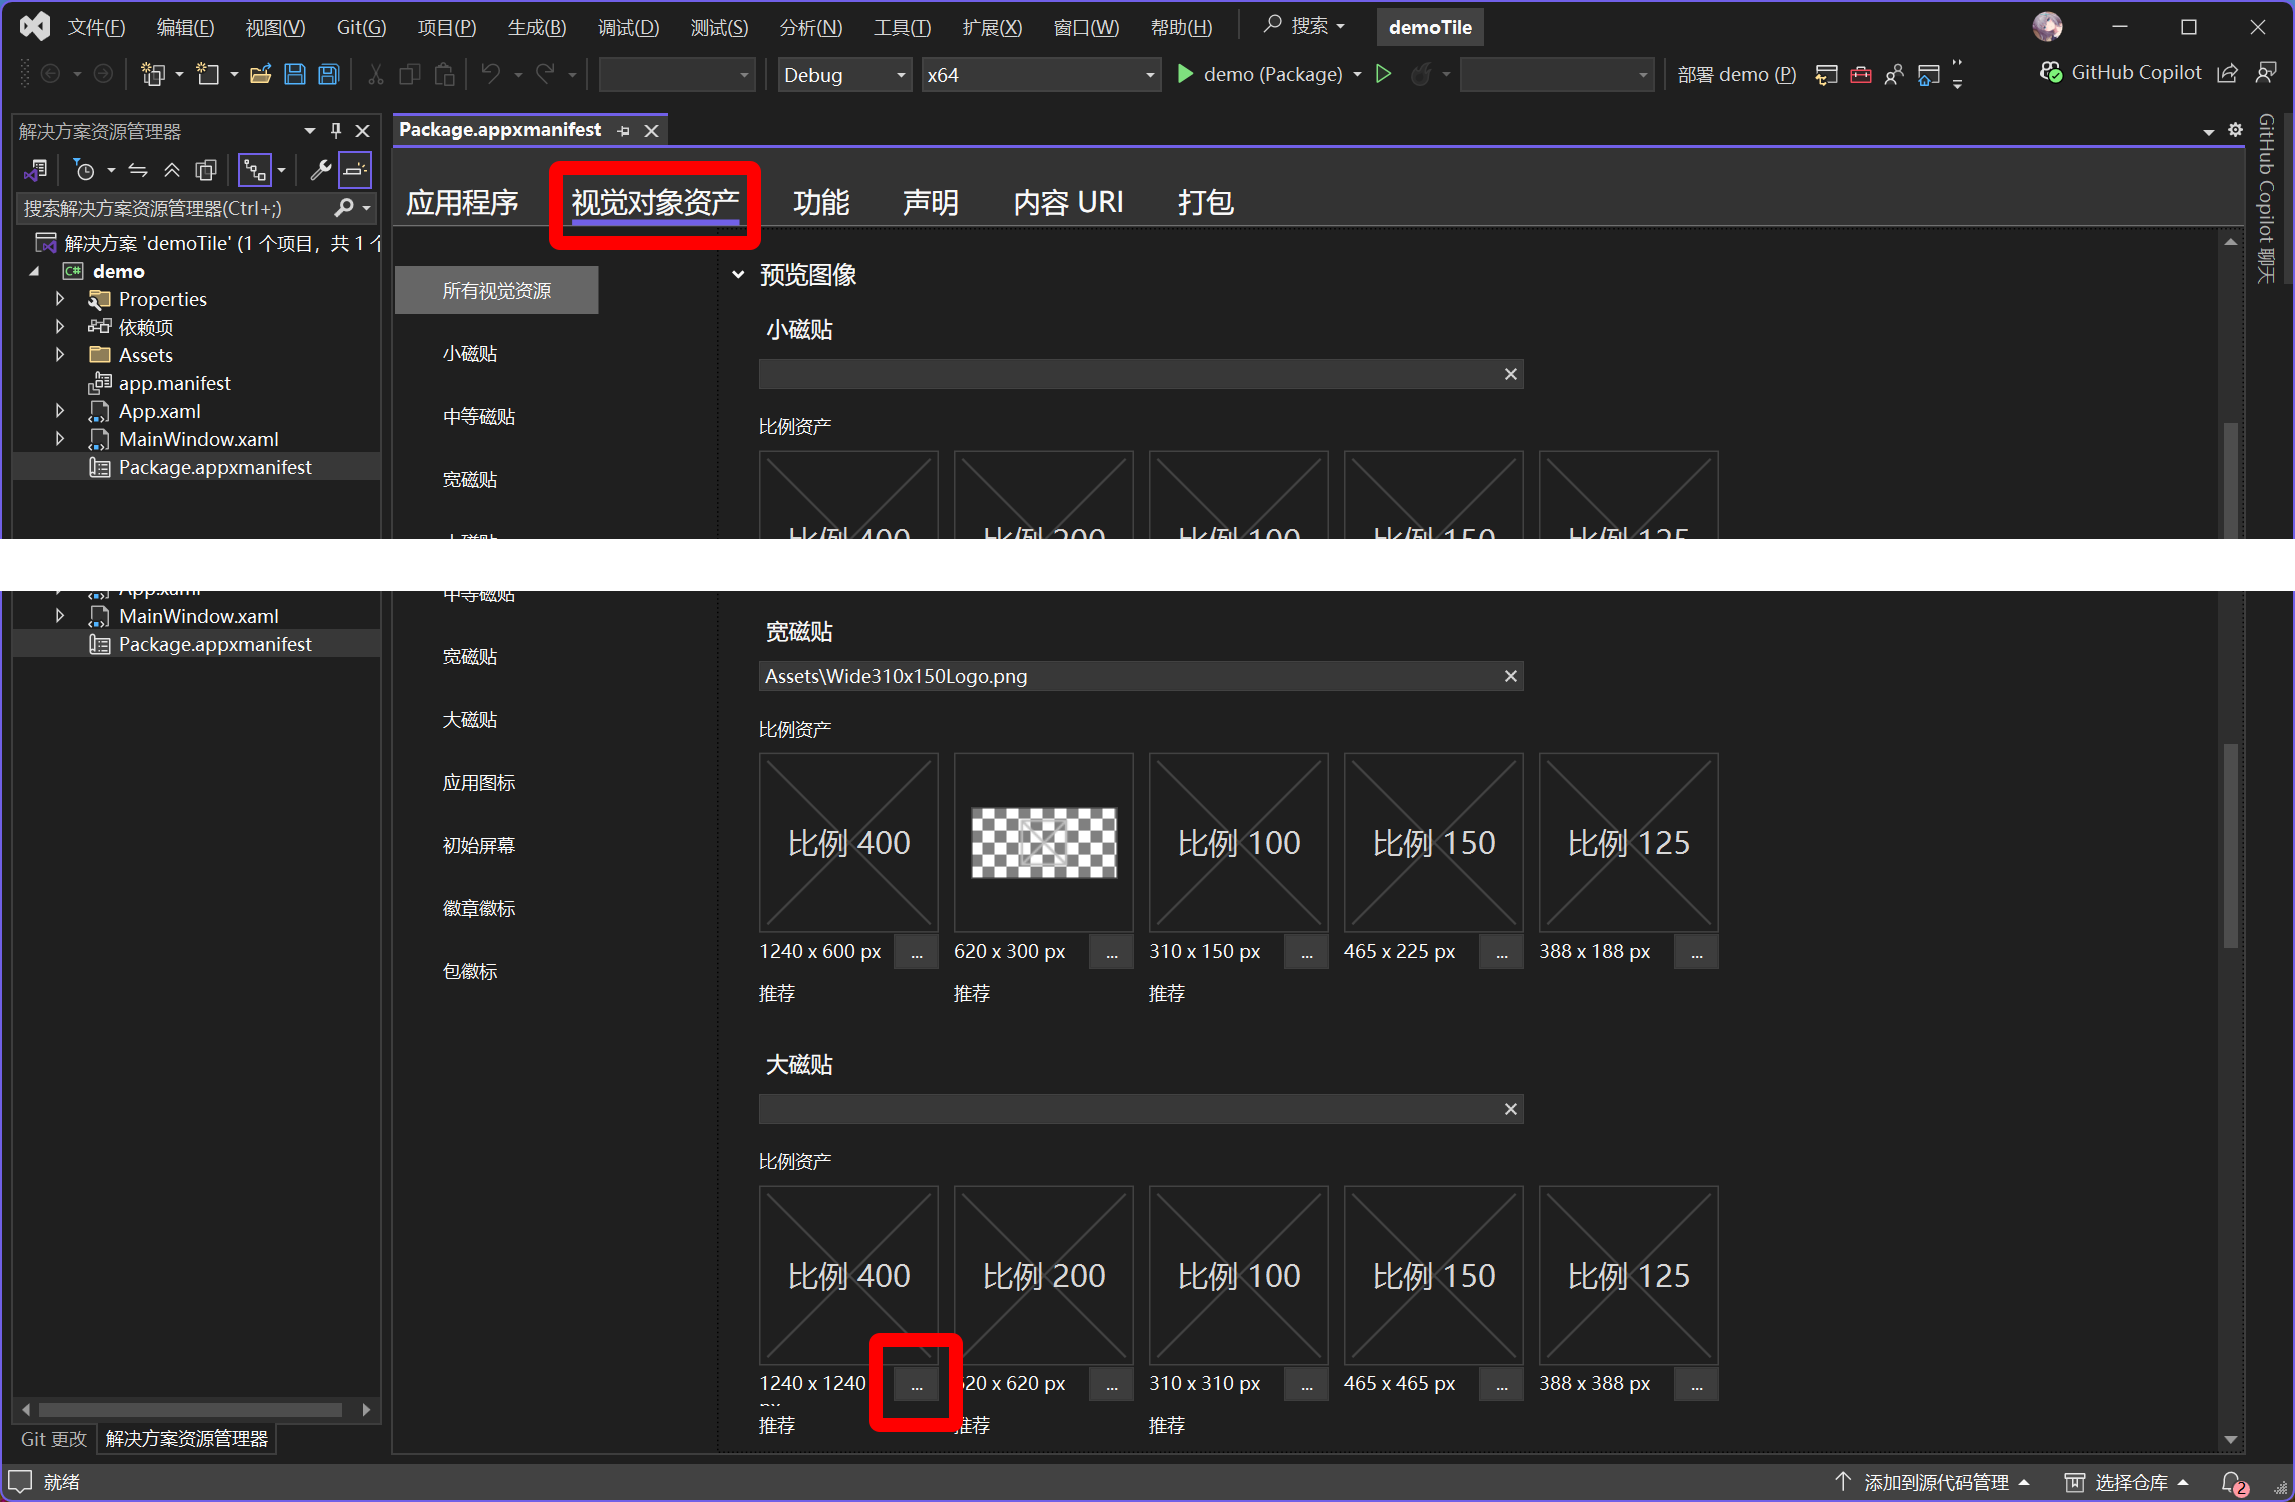
选择你的图片,若提示选择的图像无效,直接点击【确定】
此时再点击上方的 ▷ demo (Package) 进行重新部署
打开开始菜单,右键磁贴调整为大尺寸
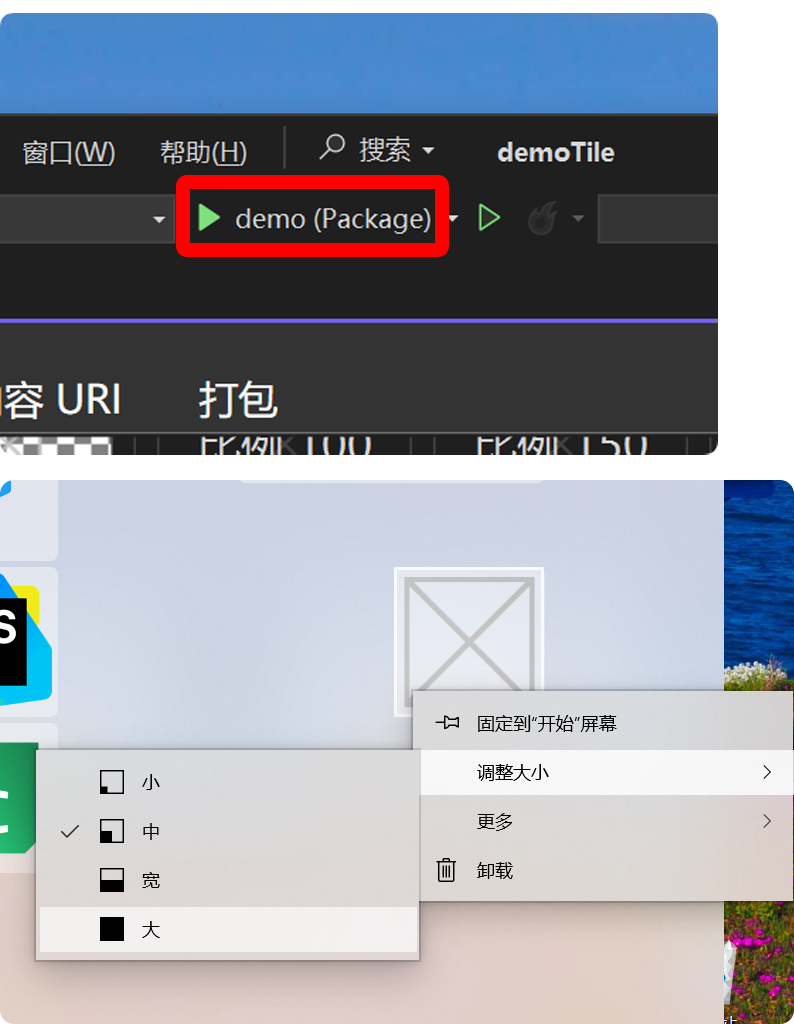
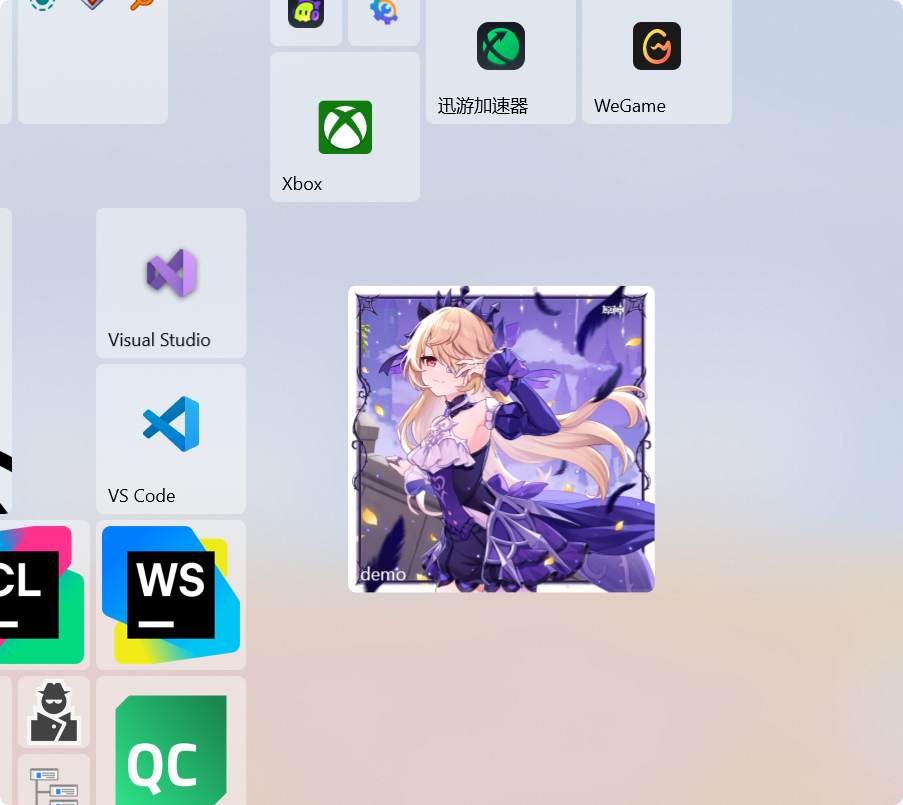
此时磁贴应该就显示你刚刚选择的图片了
左下角有App的名字,可以再刚刚视觉对象资产中显示设置中的显示名称将大磁贴取消勾选
需要更改宽尺寸就设置宽磁贴图
以上,是默认静态磁贴的全部,以下是动态磁贴的教程。
默认磁贴xml代码编辑参考:
磁贴开发
本块需要有基础编程能力 如果不会C#至少应该会C/C++/Java这类传统C系风格语言
准备同时实现以下功能
点击磁贴直接打开指定某个软件(执行某个命令)
可以随时更改磁贴显示内容
需求点:能直接执行命令,也能打开软件本身,以更改磁贴显示
实现思路:检测管理员权限或控制台启动参数,如果直接打开软件,就是执行指定命令(如打开某个软件),但不显示软件本体窗口,如果管理员方式运行或检测到某参数,则启动软件本体。
/// 在App.xaml.cs中

namespace demo
{
    /// 增加函数 bool IsAdministrator();
    /// App.OnLaunched 中判断是否需要打开窗口本体
    public partial class App : Application
    {
        public App()
        {
            this.InitializeComponent();
        }

        //相当于程序入口点main函数,只不过级别更低一些
        protected override void OnLaunched(Microsoft.UI.Xaml.LaunchActivatedEventArgs args)
        {
            m_window = new MainWindow();
            var arguments = Environment.GetCommandLineArgs();

            if (IsAdministrator() || arguments.Length > 0)
            {
                m_window.Activate();
            }
            else
            {
                //此处执行命令
            }
        }

        /// 是否运行在管理员权限下
        public static bool IsAdministrator()
        {
            var identity = WindowsIdentity.GetCurrent();
            var principal = new WindowsPrincipal(identity);
            return principal.IsInRole(WindowsBuiltInRole.Administrator);
        }

        private Window? m_window;
    }
}
变更磁贴显示
通常可以使用两种方式更改磁贴:XML文档 与 C#对象,本文主要讲解XML方法
实现一个工具类,在任意时刻传入XML字符串即可更改磁贴内容
大致实现
xml文本模板
image标签确定图片路径
XML文档生成
TileNotification对象函数调用
TileUpdater.Update(已解析的TileNotification对象);
/// namespaces
using Windows.UI.Notifications;
using Windows.Data.Xml.Dom;
/// code
string[] path = [
    "path/to/medium-picture.jpg",
    "path/to/wide-picture.jpg",
    "path/to/large-picture.jpg"];

XmlDocument XMLDoc = new();
XMLDoc.LoadXml($@"
<tile>
  <visual>
    <binding template='TileMedium'>
      <image src='{path[0]}' placement='background'/>
    </binding>
    <binding template='TileWide'>
      <image src='{path[1]}' placement='background'/>
    </binding>
    <binding template='TileLarge'>
      <image src='{path[2]}' placement='background'/>
    </binding>
  </visual>
</tile>");

TileNotification tileNotification = new(XMLDoc);
TileUpdater updater = TileUpdateManager.CreateTileUpdaterForApplication();

updater.Update(tileNotification);
对于XML文档,写法就像在写XAML或HTML一样,还是比较方便的
<text>标签可以用于显示文字:有hint-style="base"等属性作为样式<image>标签也有hint-align="center"等属性
实现整个工具类TileHelper
类TileHelper设计
任意时刻,调用TileHelper.Update(<<磁贴尺寸>>, <<XML字符串>>)可更新磁贴
C#类TileHelper实现
/// TileHelper.cs

using System;
using System.Collections.Generic;
using Windows.UI.Notifications;
using Windows.Data.Xml.Dom;

namespace demo
{
    internal class TileHelper
    {
        public enum Size
        {
            Small,
            Medium,
            Wide,
            Large
        }

        readonly TileUpdater updater = TileUpdateManager.CreateTileUpdaterForApplication();
        readonly XmlDocument xml = new();
        readonly Dictionary<Size, string> tileContents = new()
        {
            { Size.Small, "" },
            { Size.Medium, "" },
            { Size.Wide, "" },
            { Size.Large, "" }
        };

        bool SetContent(string finalXml)
        {
            try
            {
                xml.LoadXml(finalXml);
                TileNotification content = new(xml);

                updater.Update(content);
            }
            catch (Exception)
            {
                return false;
            }
            return true;
        }

        public bool Update(Size size, string tileXml)
        {
            tileContents[size] = tileXml;
            try
            {
                return SetContent($@"
                    <tile>
                      <visual>
                        <binding template='TileSmall'>
                          { tileContents[Size.Small] }
                        </binding>
                        <binding template='TileMedium'>
                          { tileContents[Size.Medium] }
                        </binding>
                        <binding template='TileWide'>
                          { tileContents[Size.Wide] }
                        </binding>
                        <binding template='TileLarge'>
                          { tileContents[Size.Large] }
                        </binding>
                      </visual>
                    </tile>");
            }
            catch (Exception)
            {
                return false;
            }
        }
    }
}
使用此工具类,创建类实例对象
准备好磁贴内容
调用
TileHelper.Update
动态磁贴(自动变化)
动态更改
更改主窗口MainWindow的内容,使得磁贴内容可以被动态的更改,无需每次都要更改代码
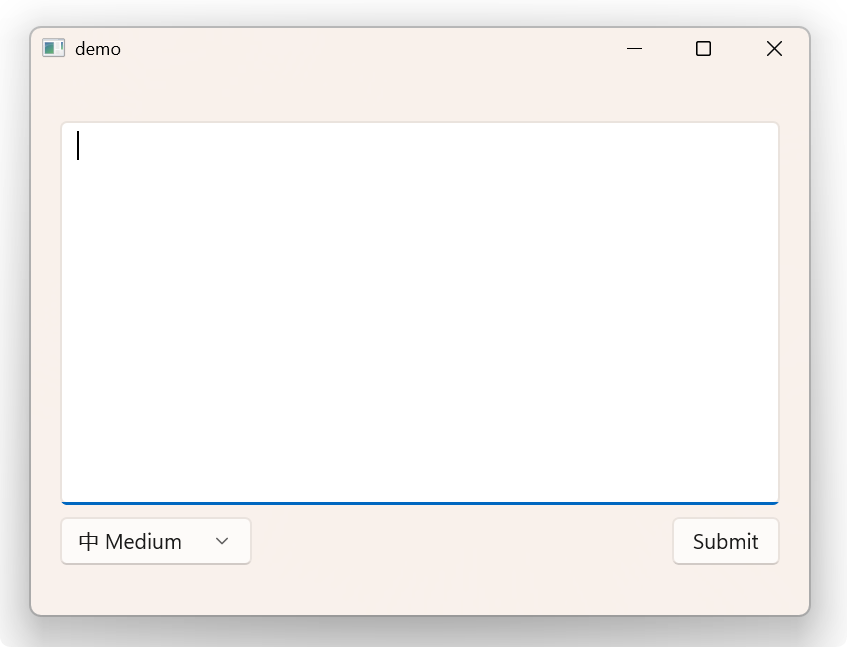
主窗口增加组件
文本编辑框:磁贴Xml文本内容
组合框:选择需要更改小、中、宽、大中的哪个
确定按钮
/// MainWindow.xaml
/// 主窗口的前端

<?xml version="1.0" encoding="utf-8"?>
<Window
    x:Class="demo.MainWindow"
    xmlns="http://schemas.microsoft.com/winfx/2006/xaml/presentation"
    xmlns:x="http://schemas.microsoft.com/winfx/2006/xaml"
    xmlns:local="using:demo"
    xmlns:d="http://schemas.microsoft.com/expression/blend/2008"
    xmlns:mc="http://schemas.openxmlformats.org/markup-compatibility/2006"
    mc:Ignorable="d"
    Title="demo">
    <StackPanel Orientation="Vertical" Spacing="8" HorizontalAlignment="Center" VerticalAlignment="Center">
        <RichEditBox x:Name="edit" Height="256"  Width="480"/>
        <StackPanel Orientation="Horizontal" Spacing="280">
            <ComboBox x:Name="sizeCombo" Width="128" SelectionChanged="sizeCombo_SelectionChanged">
                <x:String>小 Small</x:String>
                <x:String>中 Medium</x:String>
                <x:String>宽 Wide</x:String>
                <x:String>大 Large</x:String>
            </ComboBox>
            <Button x:Name="submitButton" Width="72" Click="submitButton_Click">
                Submit
            </Button>
        </StackPanel>
    </StackPanel>
</Window>
/// MainWindow.xaml.cs
/// 主窗口逻辑
using System;
using Microsoft.UI.Xaml;
using Microsoft.UI.Xaml.Controls;
using Microsoft.UI.Xaml.Media;
using Windows.Graphics;
namespace demo
{
public sealed partial class MainWindow : Window
{
readonly TileHelper tile = new();
readonly SizeInt32 windowInitialSize = new SizeInt32(800, 600);
TileHelper.Size selectedSize = TileHelper.Size.Medium;
public MainWindow()
{
InitializeComponent();
this.SystemBackdrop = new MicaBackdrop();
this.AppWindow.Resize(windowInitialSize);
this.sizeCombo.SelectedIndex = (int)TileHelper.Size.Medium;
}
public void Submit()
{
this.tile.Update(selectedSize, edit.Text);
}
public void ChangeSelectedSizeItem(TileHelper.Size size)
{
this.sizeCombo.SelectedIndex = ((int)size);
}
private void submitButton_Click(object sender, RoutedEventArgs e)
{
Submit();
}
private void sizeCombo_SelectionChanged(object sender, SelectionChangedEventArgs e)
{
int index = sizeCombo.SelectedIndex;
if (Enum.IsDefined(typeof(TileHelper.Size), index))
selectedSize = (TileHelper.Size)index;
}
}
}
最终效果应是以下窗口
自动更改
使磁贴可以在后台自动进行更改
直接创建定时器,随时更新磁贴
/// 参数Action action:要执行的函数
public Action SetInterval(Action action, double milliseconds = 0)
{
    DispatcherTimer timer = new()
    {
       Interval = TimeSpan.FromMilliseconds(milliseconds)
    };
    timer.Tick += (sender, e) =>
    {
        action();
    };
    timer.Start();
    return timer.Stop;
}

/// 调用示例伪代码
private int index = 0;
private string[] xmlContents; //在别处给定值

public void UpdateTile()
{
    if (xmlContents.Length == 0)
        return;

    //内容轮流
    index++;
    if (index >= xmlContents.Length)
        index = 0;
    tile.Update(TileHelper.Size.Large, xmlContents[index]);
}

public xxx XXX()
{
    var cancelToken = SetInterval(UpdateTile, 10000); // Call every 10s
    // ...
}
定时器并不能在后台直接运行,只能开启窗口或创建托盘图标后台运行。
若要在真实的后台更新,需要使用专门的API,且有更新频率限制,或是用Win32API创建后台服务等方式。
若使用WinUI3 无法直接调用UWP的后台BackgroundTask 后台任务
可通过的HTTP服务器传递XML文本TileUpdater.StartPeriodicUpdate
系统会按时自动更新,函数的参数如下
<<tileContentUri>>:Uri获取XML文本的HTTP地址(只能GET且无法携带自定义请求头)<<interval>>: PeriodicUpdateRecurrence更新时间间隔(枚举,最快为HalfHour半小时)
Q&A
总体还是比较简单的,不过还是作为新手教程,内容是非常详细的,如果还是看不懂,那需要看看自己的基础是否有问题了。
问: 为什么用WinUI3项目模板,而不是直接空项目、UWP,理论硬盘占用会小很多?
答: 因为本文是“轮椅”教程,如果是使用像UWP等等,磁贴图片会有大小、尺寸等限制,使用WinUI可能是因为用于Win11,所以取消了这些限制,更容易上手。
总结
默认磁贴
不需要任何代码,创建项目,准备好图片即可部署
动态磁贴
使用对象 TileUpdater updater = TileUpdateManager.CreateTileUpdaterForApplication();
// 可用定时器执行
updater.Update(xml__Xml_Text); //直接更新

// 直接后台执行,且只能是HTTP服务器GET方法,最少半小时一次更新
updater.StartPeriodicUpdate(uri__HTTP_GET, interval__MIN_halfHour);
磁贴Xml内容示例
<tile>
  <visual>
    <binding template='TileSmall'>
      <image src="D:/path/to/your/file.jpg" placement='background'/>
    </binding>
    <binding template="TileMedium" hint-textStacking="center" branding="logo">
      <image placement="peek" hint-crop="circle" src="Assets/head.png"/>
    </binding>
    <binding template='TileWide'>
      <text hint-style="base" hint-align="center">Tile</text>
      <text hint-style="captionSubtle" hint-align="center">Hello, World</text>
    </binding>
    <binding template="TileLarge" hint-textStacking="center">
      <group>
        <subgroup hint-weight="1"/>
        <subgroup hint-weight="2">
          <image src="Assets/Apps/Hipstame/hipster.jpg" hint-crop="circle"/>
        </subgroup>
        <subgroup hint-weight="1"/>
      </group>
      <text hint-style="title" hint-align="center">Hi,</text>
      <text hint-style="subtitleSubtle" hint-align="center">fischldesu` Custom Tile</text>
    </binding>
  </visual>
</tile>
更多样式设计,请参考微软官方文档 磁贴内容架构 | Microsoft Learn
更多特殊内容,参考该官方文档的左侧同级菜单
最后集成各功能于一体:
集成功能后的软件设计
Github Repo Windows Custom Tile
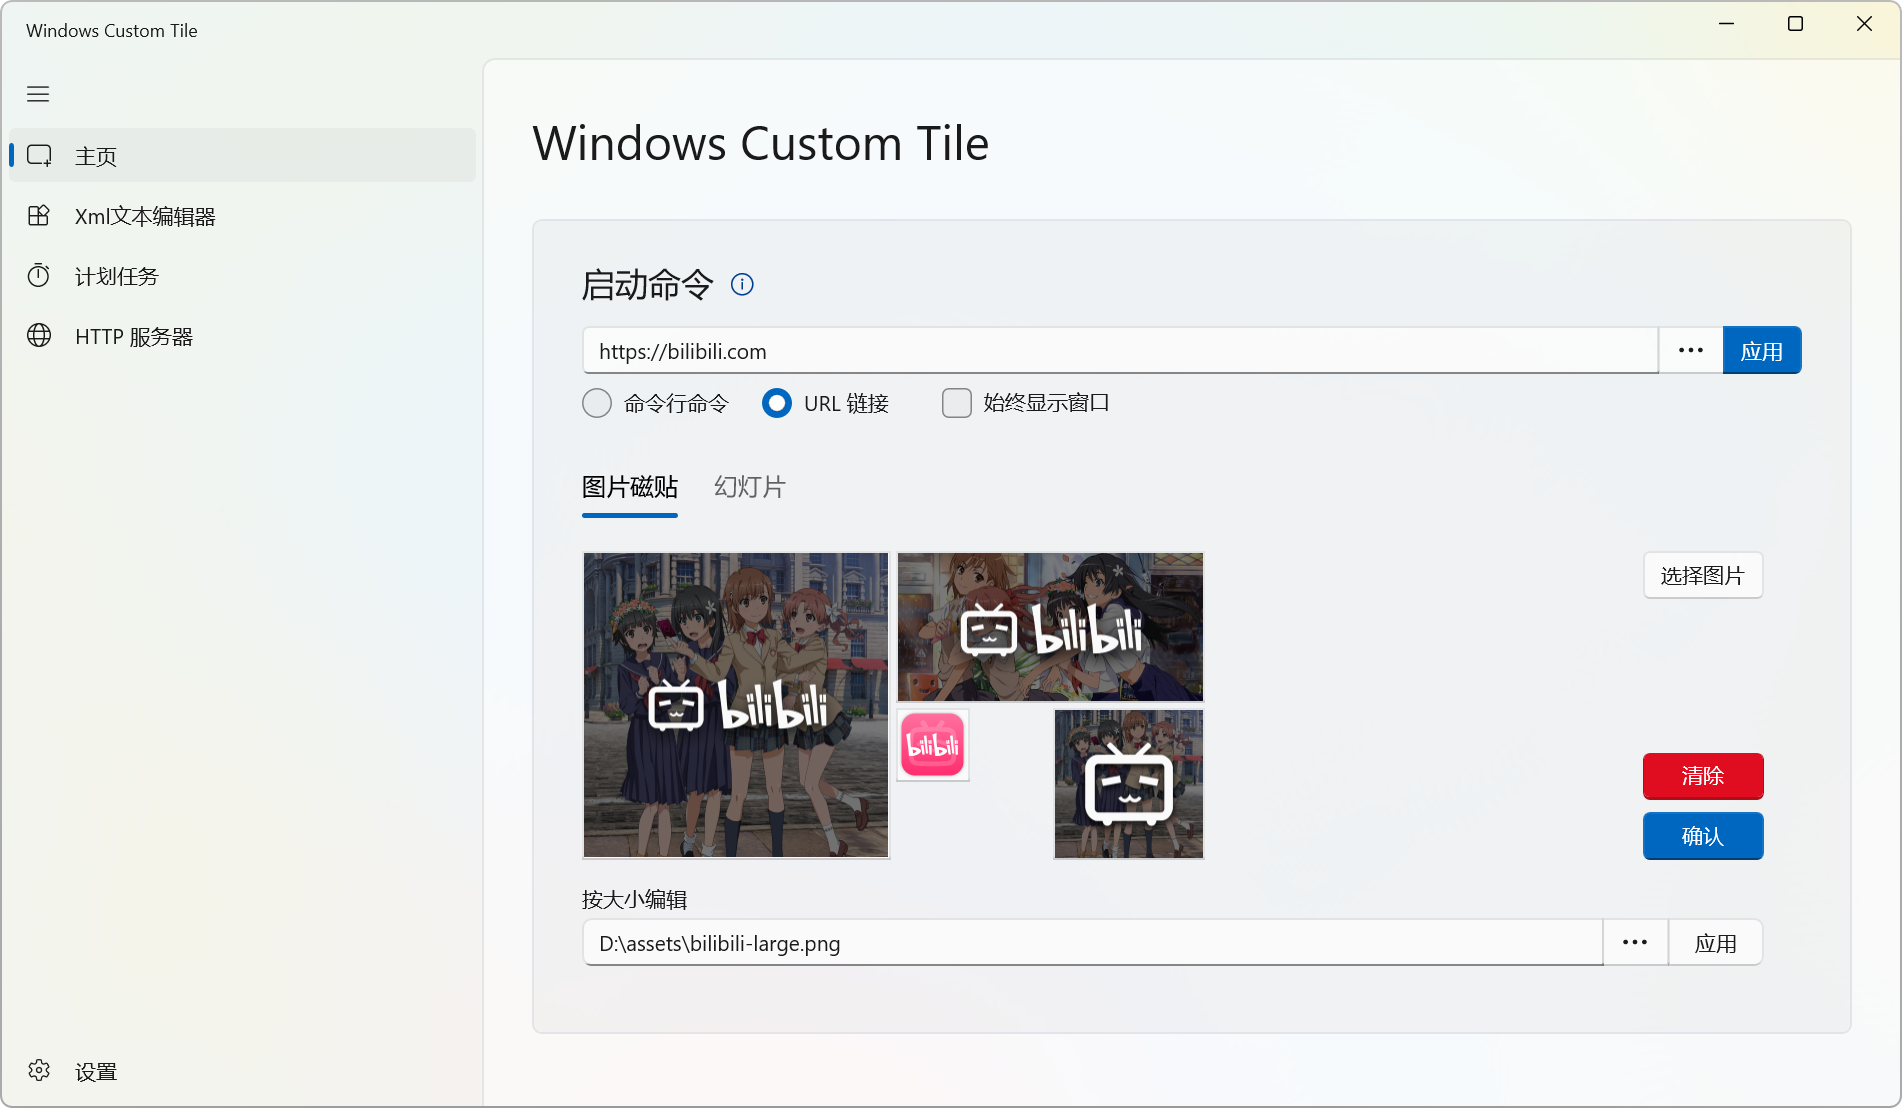
演示版本(2525 8月):0.1.0 使用 .NET8 WindowsAppSDK 1.7
源码在Github仓库 https://github.com/fischldesu/WindowsCustomTile
核心还是前文所介绍的 TileUpdater的Update以及StartPeriodicUpdate两个成员函数,如果学过C++ Java .NET 等等,应该都能快速上手。
软件还包含 详细使用教程等等: WindowsCustomTile Wiki
本文API使用2025 5月最新版本(VS2022)从WinUI3的C#模板生成
参考
微软官方文档 WindowsAppSDK
磁贴与动态磁贴:UWP开发-磁贴
WinUI3开发:WinUI3 Gallery
AI代码补全:Github Copilot <VisualStudio plug-in>